Hector Mapping in ROS using YDLidar X4
- Archit Shah

- Apr 21, 2019
- 4 min read
Recently, I started working on developing a low-cost autonomous car using ROS (Robot Operating System). So I decided to buy stuff to build it. One of the first thing that I bought was a lidar. After doing a bit of research I came across YDLidar X4. It is a 2D lidar with 360 degree range at an affordable price (99 $). Only a handful of lidars are as cheap as this one, one of them is RPLidar A1M8. One of the reason of choosing this lidar is that it is ROS compatible.
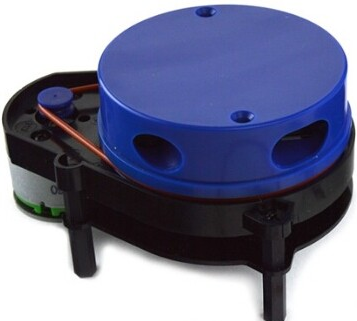

Today I am going to show you step-by-step method on how to do Mapping using the YDlidar X4. For this you will require just three things (Mostly, all these will be included with your lidar)
Device Connection:
When evaluating and developing X4 under windows, you need to interconnect X4 and PC. The specific process is as follows:
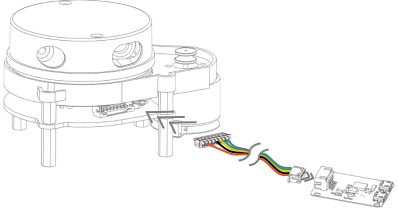

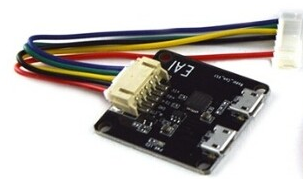
Connect the adapter board and X4 first, and then connect the USB cable to the USB port on the adapter board and the PC. Note that the USB interface's Micro interface is connected to the USB adapter's USB_DATA. After the X4 is powered on, it is in idle mode and the motor does not turn.
The drive current of the USB interface of some development platforms or PCs is weak, and the X4 needs to access the +5V auxiliary power supply, otherwise the radar will work abnormally. In that case you can supply power through USB-PWR pin.
ROS Driver Installation:
I am assuming you have ROS installed in your Linux system. If not, I encourage you to install ROS in order to move forward with this tutorial. One more thing, I have used kinetic kame distro for this tutorial. So if you have some other distribution, chances are that it might not work for you. Anyways moving forward, assuming you have all the above things setup. Lets jump to something useful.
Getting started:
In order to get started, jump into the source directory of your ROS workspace.

Now you have to clone the ydlidar ros driver package in this folder.

If everything went well you will see ydlidar package inside your source directory. Now switch to your ros workspace and compile it.

After the compilation is complete, add the ydlidar environment variable to the ~/.bashrc file and make it effective.

Add a device alias /dev/ydlidar to the X4 serial port.

Alright now you are all set. Now to check whether everything is running fine, launch the lidar_view.launch file in order to see the results of the scan
Note: Make sure your lidar is connected to the PC.

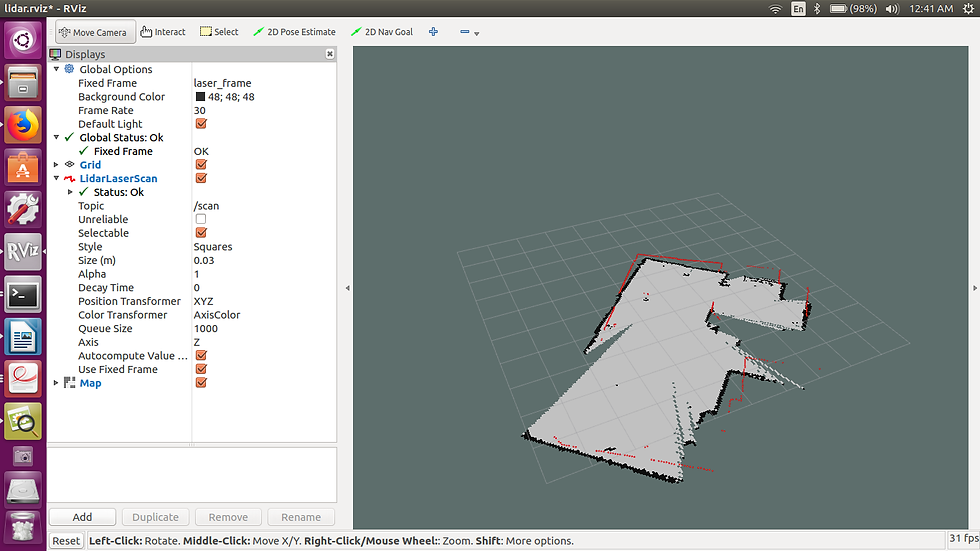
Once you launch this file, the rviz will pop up and you can see the laser scan data as follows.
Alright, so we can visualize the laser scan data using rviz. So now the next step will be to create a map out of it.

Hector Mapping:
Here we just have one sensor (ydlidar), now in order to do mapping with only one sensor, we are going to use hector mapping approach. (Hector mapping is a SLAM approach that can be used without odometry as well as on platforms that exhibit roll/pitch motion (of the sensor, the platform or both).
So if you do not have hector_slam package in your system, I encourage you to install it in order to do the next steps. You can install the hector_slam package by simply typing in the following command.

Now the next step is to understand the transform tree structure when you run the lidar_view.launch file. So again, launch the lidar_view.launch file

Once you launch this file, Open a new terminal and in that go to the ydlidar package and then run the following command.
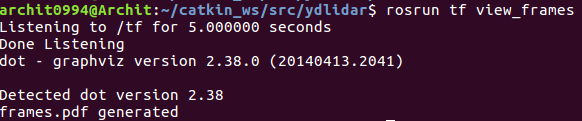
You will notice there is a frames.pdf generated in your ydlidar package. When you open that file using document viewer, you will see the following transform tree.
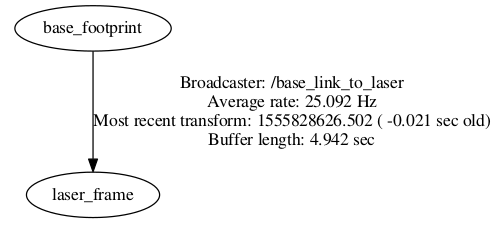
As you might have noticed there is no mapping node in this figure, that is because we still have not used it yet. So the next step is to introduce hector mapping in this.
Go to the launch folder of your ydlidar driver package and create a new launch file called all_nodes.launch

Copy the following code in to the all_nodes.launch file
<launch>
<node name="ydlidar_node" pkg="ydlidar" type="ydlidar_node" output="screen" respawn="false" >
<param name="port" type="string" value="/dev/ydlidar"/>
<param name="baudrate" type="int" value="128000"/>
<param name="frame_id" type="string" value="laser_frame"/>
<param name="low_exposure" type="bool" value="false"/>
<param name="resolution_fixed" type="bool" value="true"/>
<param name="auto_reconnect" type="bool" value="true"/>
<param name="reversion" type="bool" value="false"/>
<param name="angle_min" type="double" value="-180" />
<param name="angle_max" type="double" value="180" />
<param name="range_min" type="double" value="0.1" />
<param name="range_max" type="double" value="16.0" />
<param name="ignore_array" type="string" value="" />
<param name="samp_rate" type="int" value="9"/>
<param name="frequency" type="double" value="7"/>
</node>
<node pkg ="tf" type="static_transform_publisher" name="map_to_odom" args="0.0 0.0 0.0 0.0 0.0 0.0 /map /nav 40"/>
<node pkg ="tf" type="static_transform_publisher" name="odom_to_base_link" args="0.0 0.0 0.0 0.0 0.0 0.0 /nav /base_footprint 40"/>
<node pkg="tf" type="static_transform_publisher" name="base_link_to_laser" args="0.2245 0.0 0.2 0.0 0.0 0.0 /base_footprint /laser_frame 40" />
<include file="$(find hector_mapping)/launch/mapping_default.launch" />
<node pkg="rviz" name="rviz" type="rviz" args="-d $(find ydlidar)/launch/lidar.rviz" />
<include file="$(find hector_geotiff)/launch/geotiff_mapper.launch" />
</launch>
This file is an addon to the lidar.launch file, which you can find it in the launch folder. I have added few things to the lidar.launch file in order to perform mapping.
As you can see I have added two transform broadcaster in addition to base_link_to_laser broadcaster.
1) map_to_odom
2) odom_to_base_link
Also I have included two launch files
1) mapping_default.launch from hector_mapping package
2) geotiff_mapper.launch from hector_geotiff package
The rest everything is the same as the lidar.launch file
Now depending on your requirements you can change the parameter values from the above file, I just have kept it the way it is
The above addition of transform broadcaster was necessary in order to transform data from laser node to the map node, else you won’t get the correct map.
Alright we are almost there, now the final step is to launch the above file and see the result in rviz. So let’s do it.

On launching the file, you can visualize the map in the rviz
Once you are done with this, you might want to check the transform tree again and see the difference.
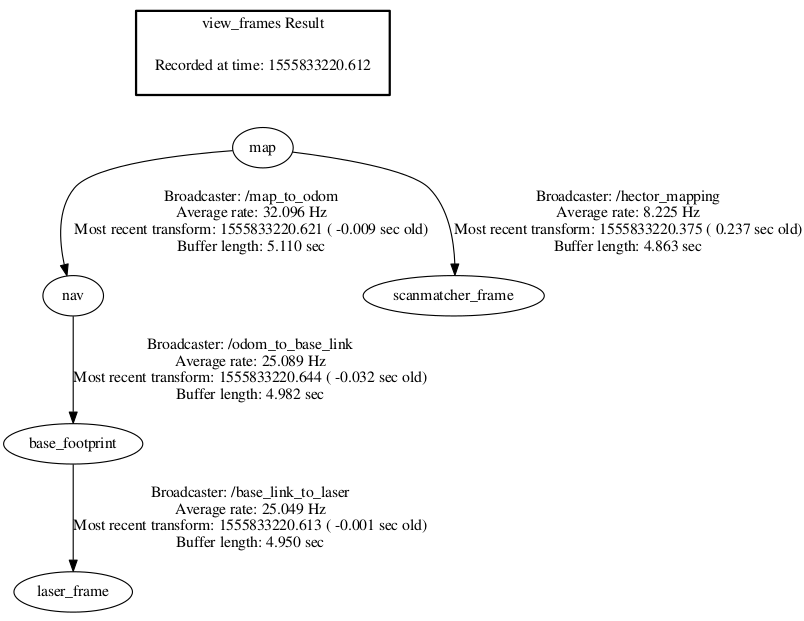
You can see the difference as compared to the transform tree we got above. Here, we have established a transformation from the mapping node to the laser_frame node. As a result we are able to generate map from the laser frame.
BAUD RATE FROM 115200 TO 128000
hi, thank you for tutorial. do you know why my map is jiggling?
my fixed frame is laser_frame
<launch>
<node pkg ="tf" type="static_transform_publisher" name="map_to_odom" args="0.0 0.0 0.0 0.0 0.0 0.0 /map /nav 40"/>
<node pkg ="tf" type="static_transform_publisher" name="odom_to_base_link" args="0.0 0.0 0.0 0.0 0.0 0.0 /nav /base_footprint 40"/>
<node pkg ="tf" type="static_transform_publisher" name="base_link_to_laser" args="0.2245 0.0 0.2 0.0 0.0 0.0 /base_footprint /laser_frame 40" />
<include file="$(find hector_mapping)/launch/mapping_default.launch" />
<include file="$(find hector_geotiff)/launch/geotiff_mapper.launch" />
</launch>